Page cover image

Ownership teams

Team ownership features are only available on Growth and Isolation plans.

If you ever wondered, "Who are the experts on this app in my system?", you can find exactly that with Ownership teams on IcePanel.

Ownership teams are a great way to show groups of people as experts on an object, giving better accountability for keeping everything updated. On each assigned object, you can see the names, roles and emails of those in the assigned team(s) so you can speak to the right person quickly. Object details can also be locked so they're only editable by team owners.

Creating an ownership team

Only organization Admins can create, edit and delete teams.

To create an ownership team from the landscape page:

  1. Navigate to the Teams tab.

  2. Click the + New team button.

    • If you have already created a team, click on the team dropdown and then the + New team button at the bottom of the list.

  3. Name your new team.

  4. Click Create team.

Creating a team in a landscape

To create an ownership team from the management page:

  1. Navigate to the Ownership teams tab on the left.

  2. Click the + New team button.

  3. Name your new team.

  4. Click Create team.

Creating a team in the manage section

Adding people to a team

You can invite people in your organization to any team on the management or landscape page.

To invite people to a team:

  1. Navigate to Ownership teams in the management or landscape page.

  2. Select the team to which you want to add people from the dropdown.

  3. Click the Add team member button.

  4. Click Add on the people who you want to add to the team.

  5. You can also use the search bar to find specific people.

Adding people to a team

Removing people from a team

To remove people from a team:

  1. Navigate to Ownership teams in the management or landscape page.

  2. Select the team from which you want to remove someone in the dropdown.

  3. Click the Remove button beside the team member.

Removing someone from a team

Assigning ownership teams to objects

You can assign an owner to your objects in a diagram or model view. This clarifies which teams are responsible for the object and see contact information (emails) of specific team members.

To assign an owner:

  1. Select the object to which you want to assign an owner.

  2. In the right-hand menu, click on the Owners field. By default, it'll be empty.

  3. Select the team you want to assign ownership to. You can select more than 1 team.

  4. Click on the dropdown icon of a team to see all team members (name, role). You can also copy their email address by hovering on the mail icon.

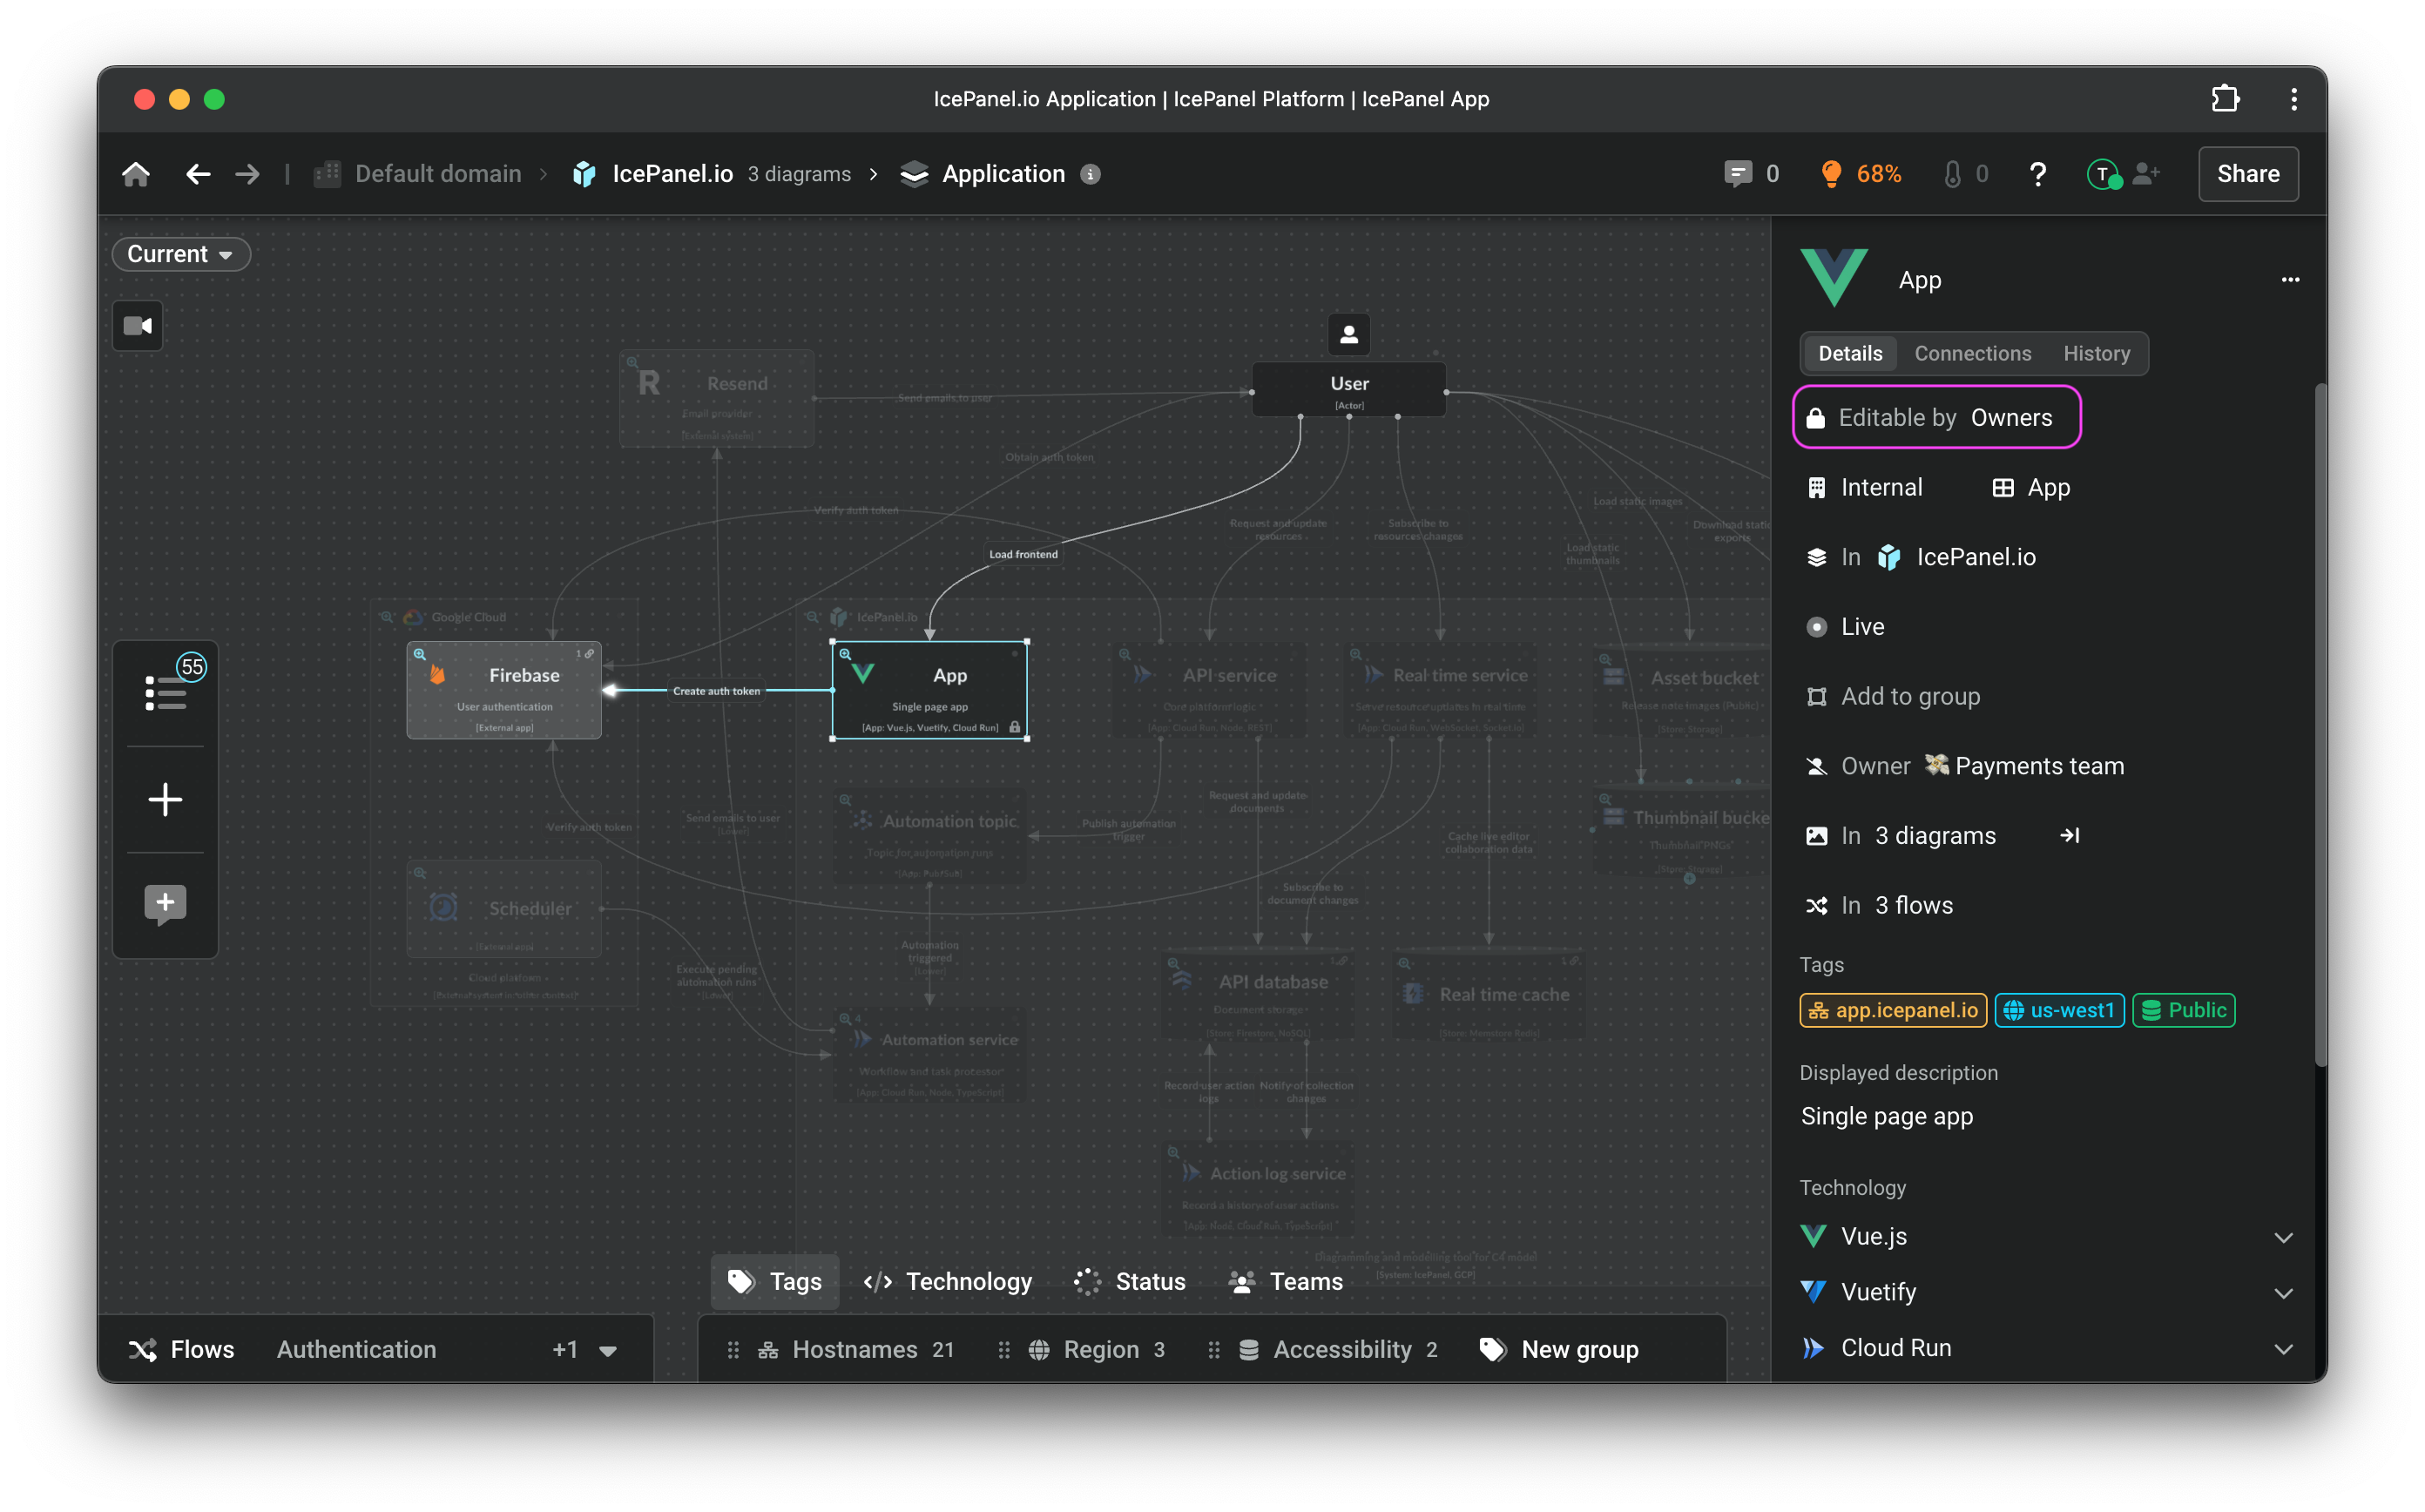
Assigning an owner to an object

Viewing team objects

You can view all the teams' objects to get an overview of their scope within your landscape.

To see this:

  1. Navigate to Teams from the landscape page or manage organization section.

  2. Click the View team objects button.

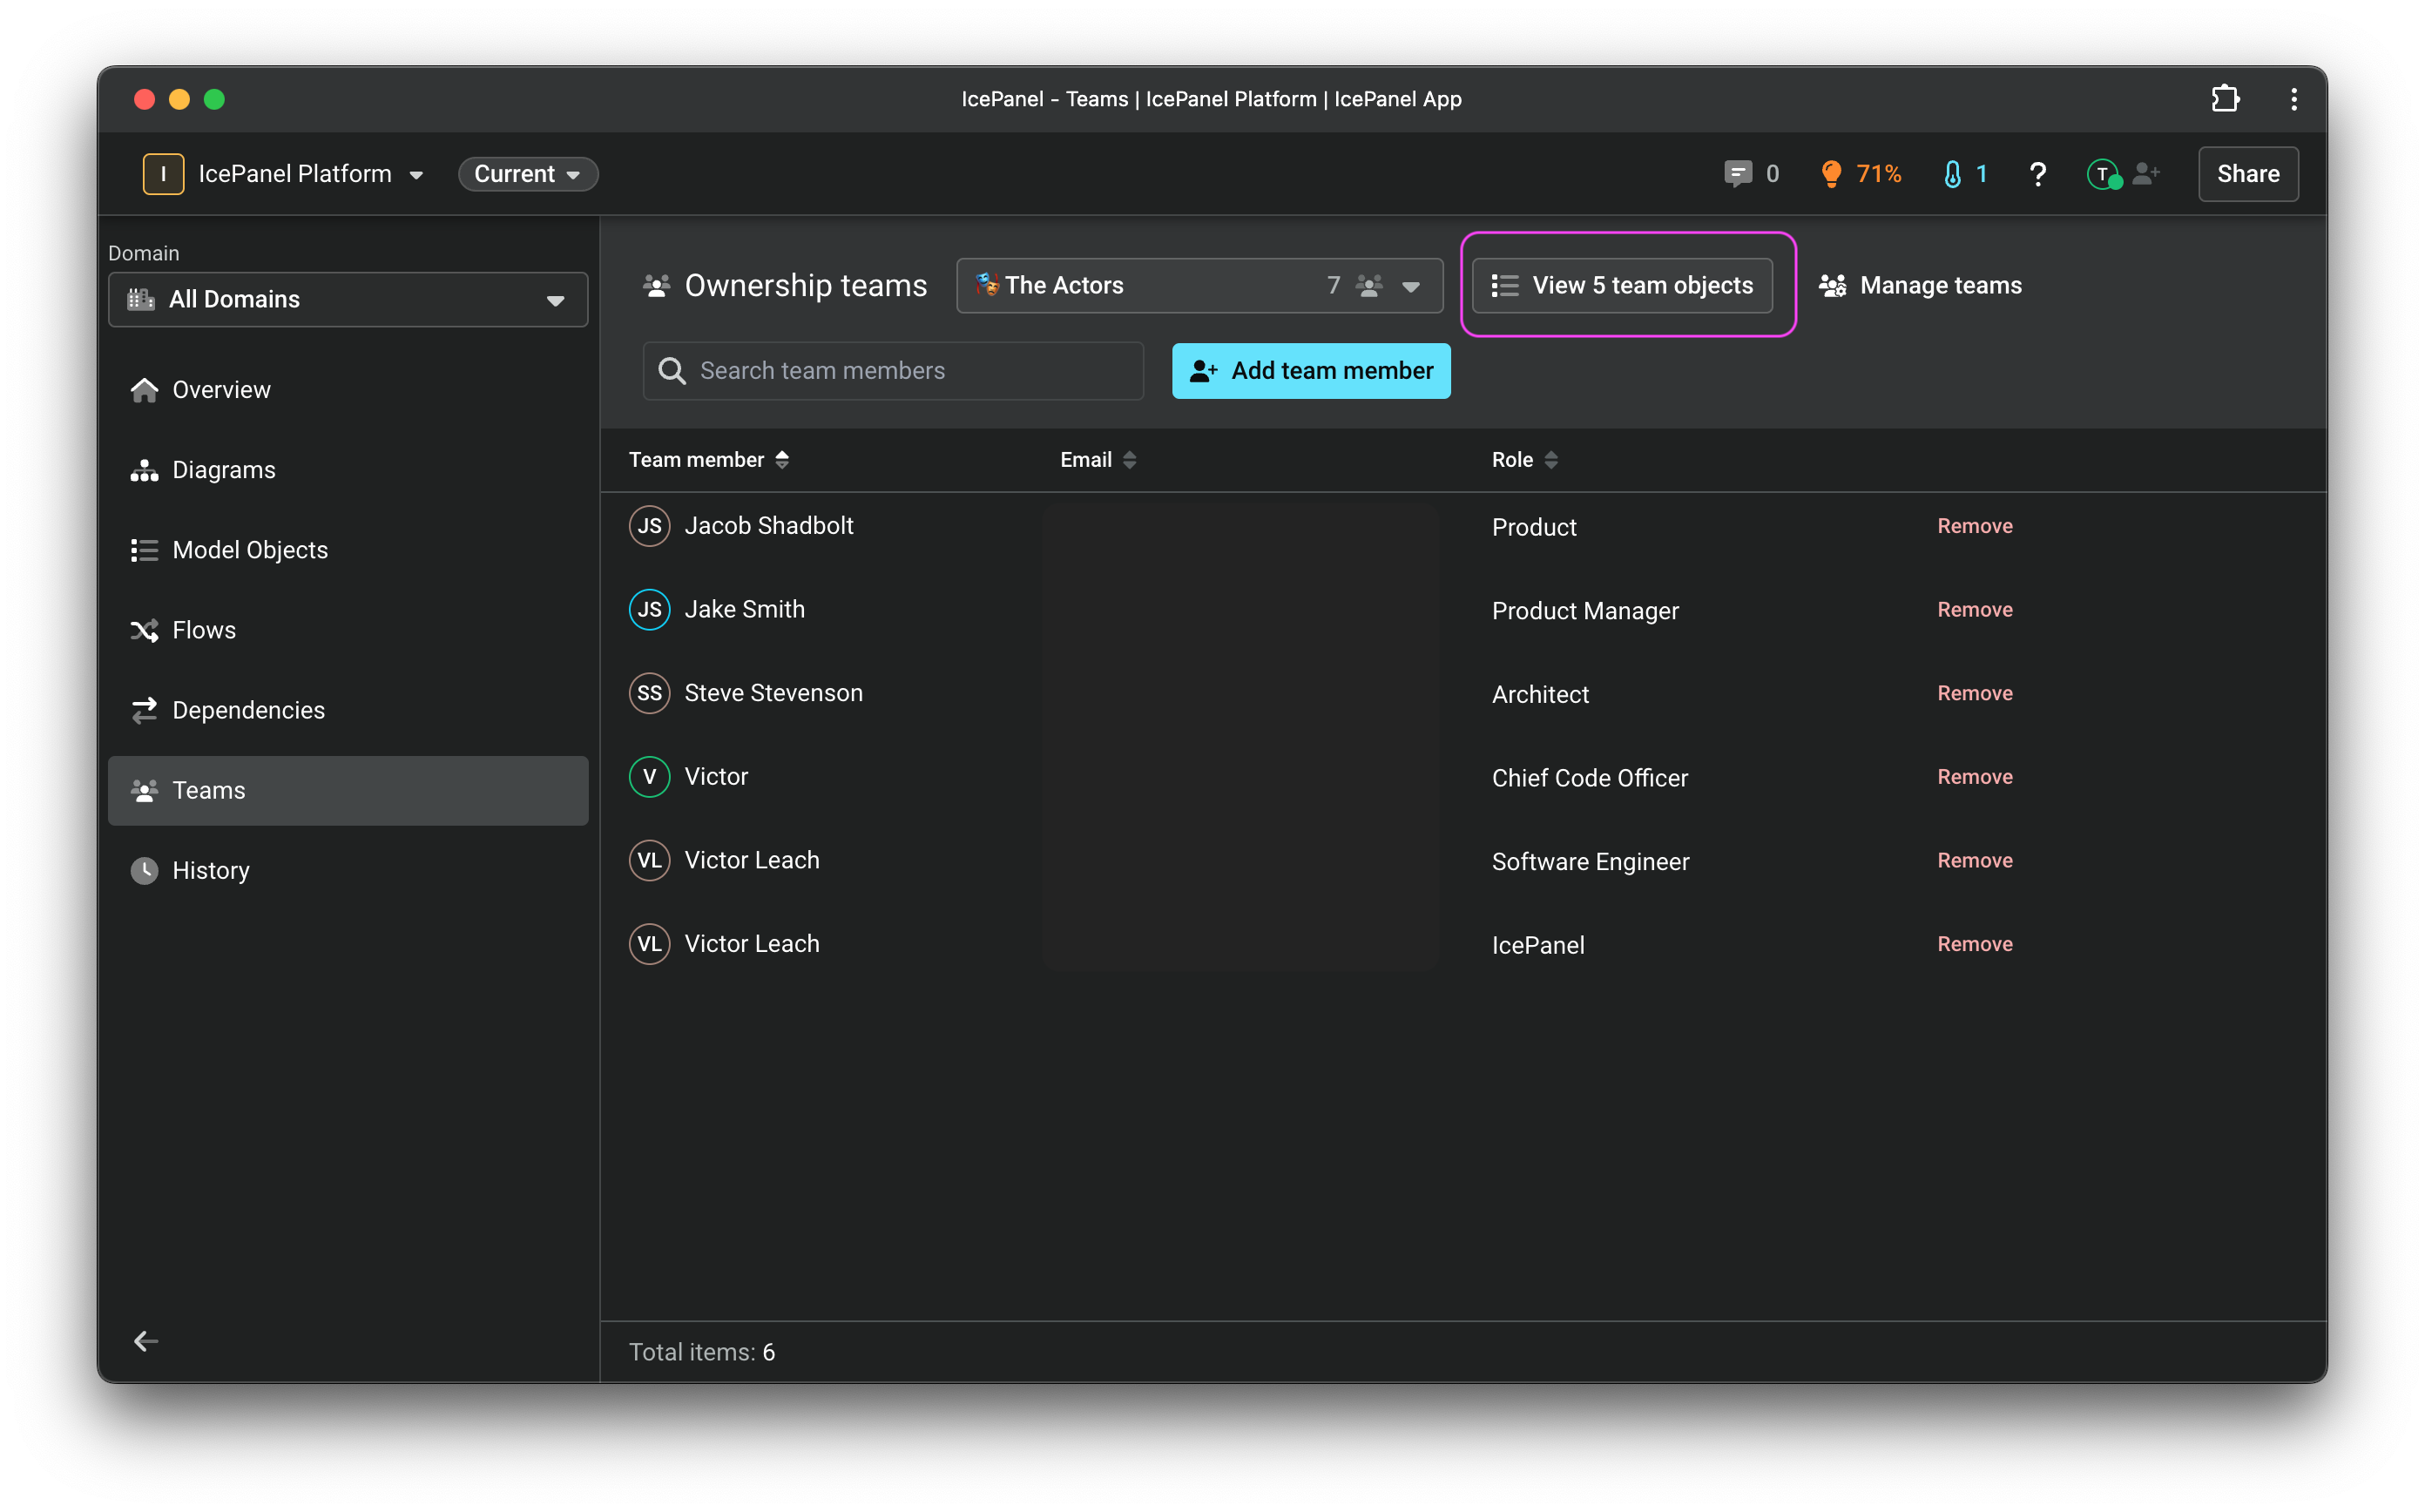
Viewing team objects from the landscape page

Deleting a team

To delete a team:

  1. Navigate to Teams from the landscape page or manage organization section.

  2. Click on the team dropdown.

  3. Click the button beside the team you want to delete.

  4. Click the Delete team button.

  5. Click the Delete button to confirm.

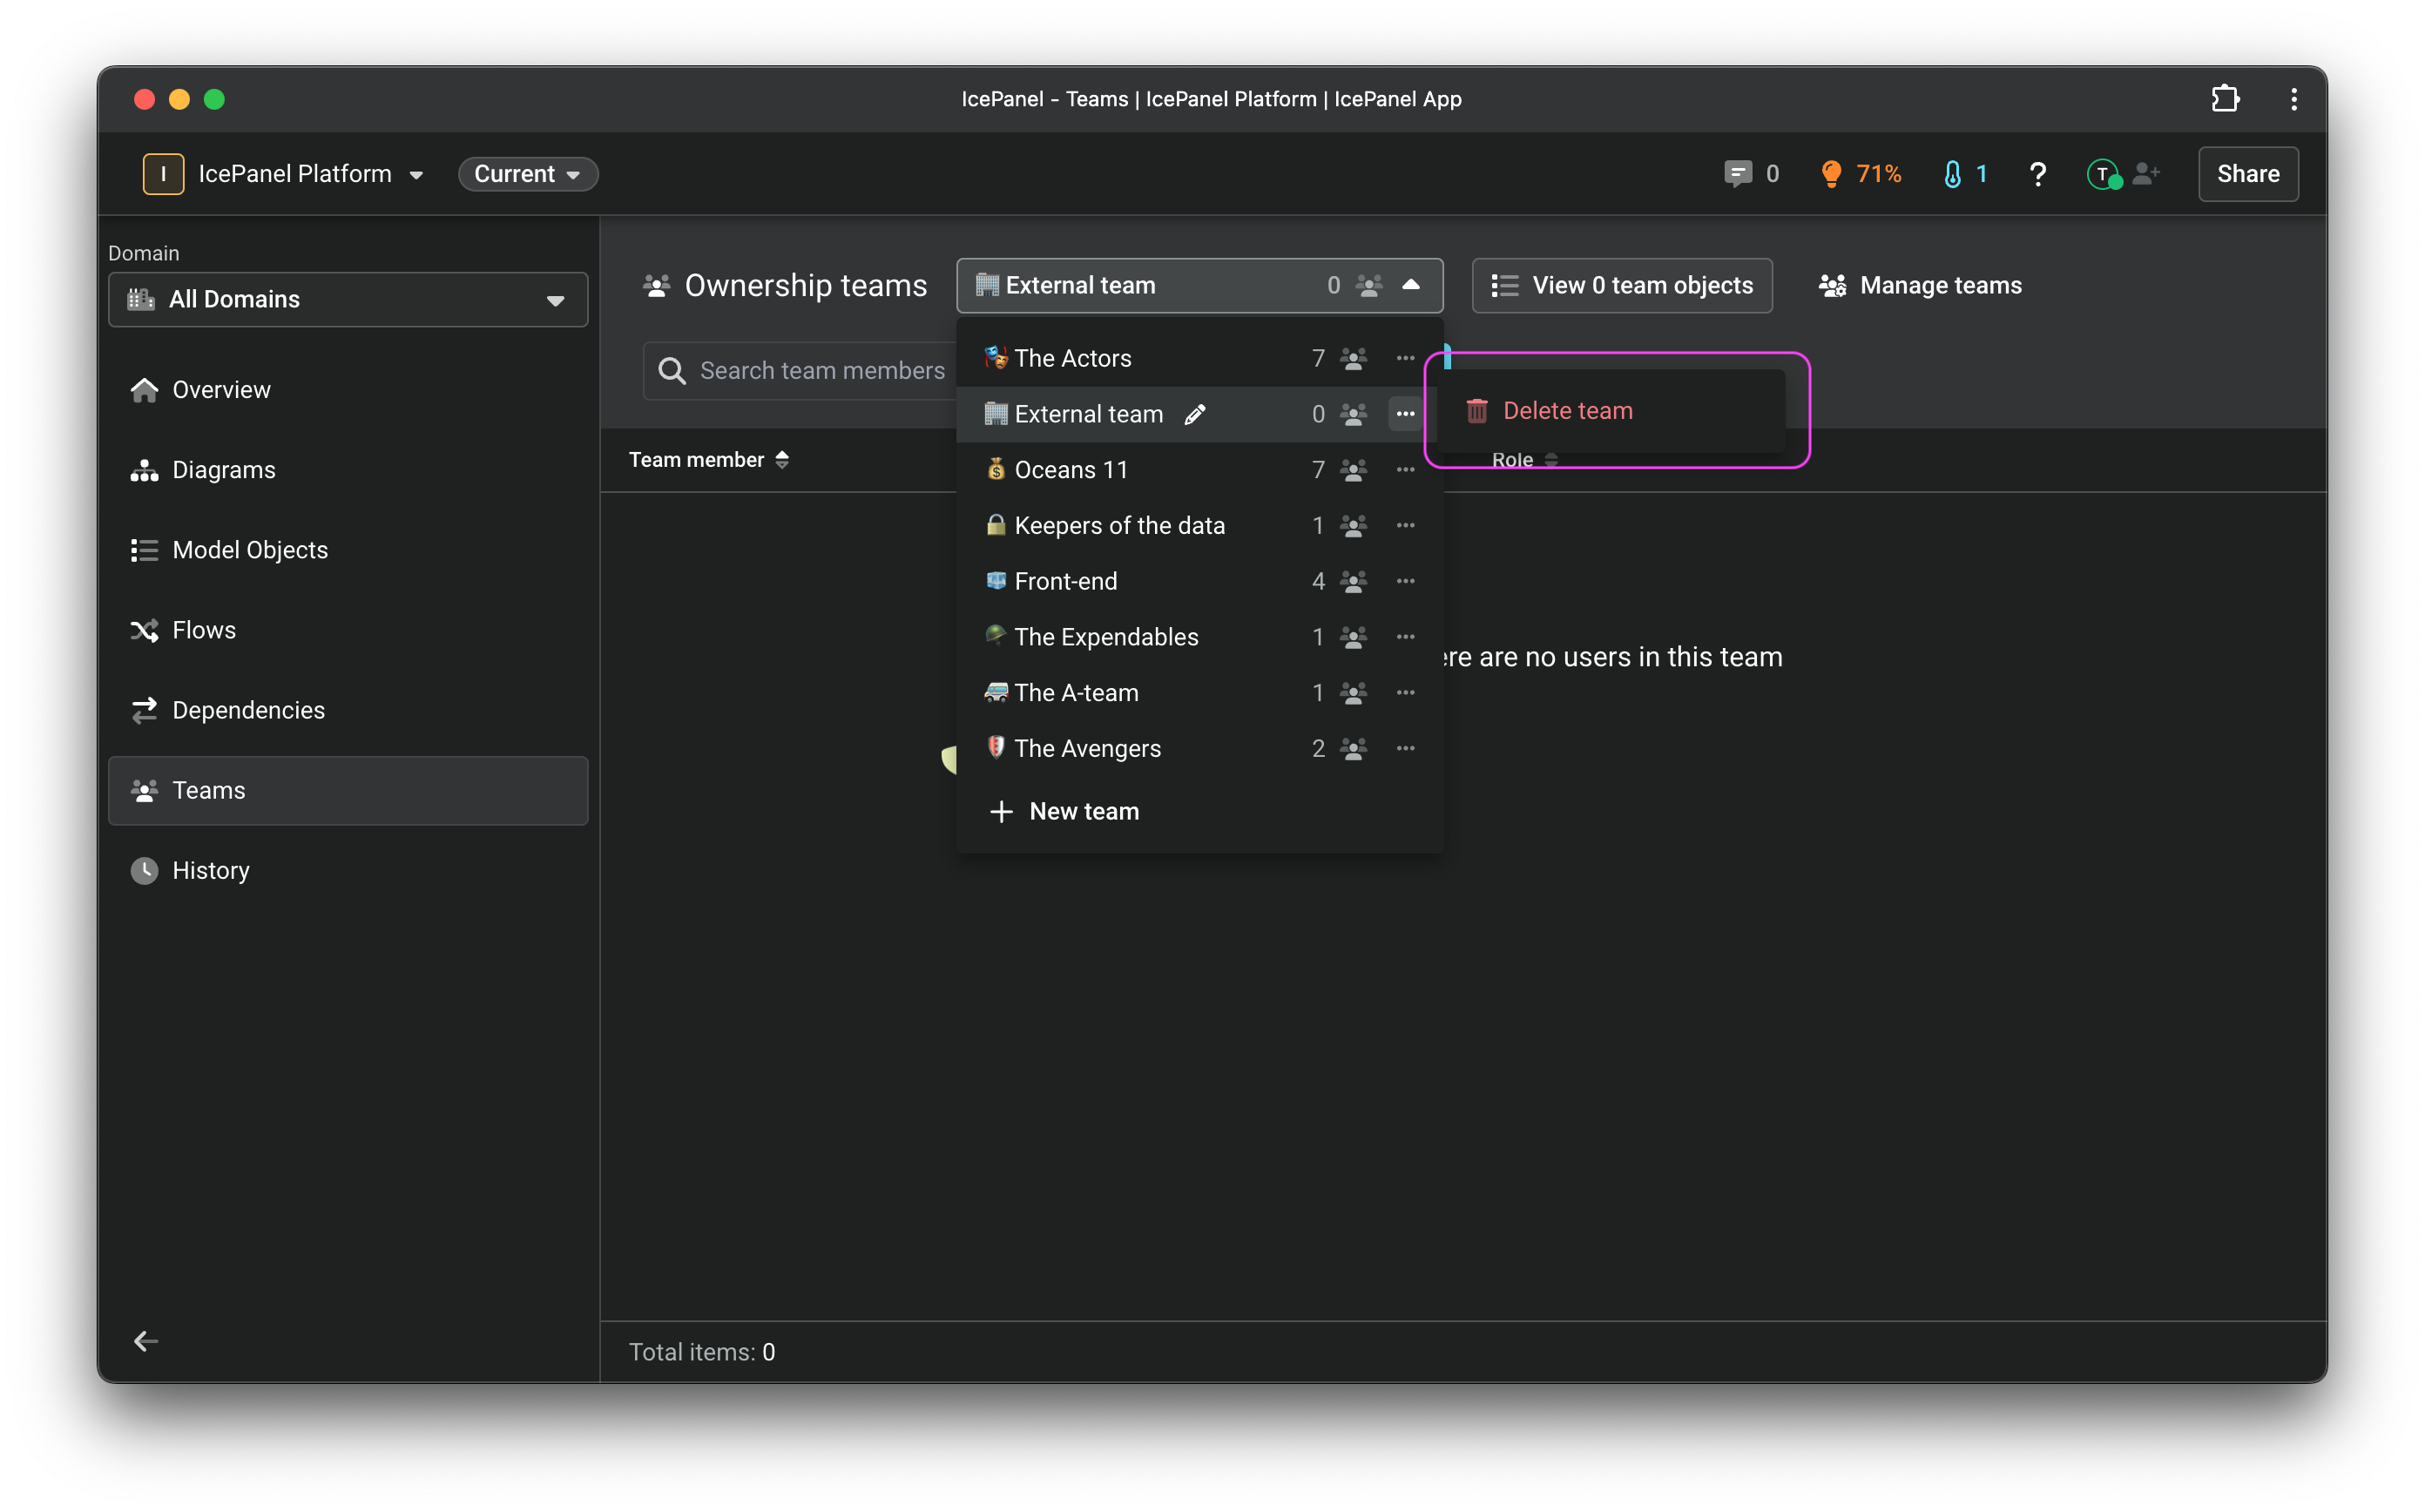
Deleting a team from the landscape page

Locking object details from being edited

Object details such as their name, type, and status can be locked from being edited by non-owners. When you lock an object, only Admins and Owners can edit the details or delete it from your model. All outgoing connections from that object will also be restricted from being edited. Editors can still remove locked objects or their outgoing connections from the diagram.

To lock object details:

  1. Select the object you want to lock.

  2. In the right-hand menu, select the team(s) you want to lock edit access to in the Owner field.

  3. Click on the Editable by field (by default, this is set to all editors) and change it to Owners only.

Locking an object to owners

Locking an object to a team restricts non-owners from editing its details. However, nested objects will still be editable. For example, if you lock an app, other teams won't be able to change its name, but they'll be able to add, edit, or delete objects such as components within the app.

If you attempt to remove a team you're a part of as an Owner of a locked object, you'll see a confirmation prompt. Only do this if you're certain that you no longer need access to the object. You'll need an Admin or another owner to give you access again.

Confirmation screen

When non-owners view a locked object, they'll see a banner at the top of the details menu. They'll be unable to change or delete the object from the model.

Locked object

Last updated

Was this helpful?