SSO - SAML
IdP-initiated login is now available. If you’re an existing client and would like to be migrated, please email us. If you’re new, fill out the form below.
Configuring single sign using SAML integrates IcePanel with your organizations identity provider. This allows users in your organization to securely and easily sign in to IcePanel without the need to manage additional credentials.
Getting started
Instructions can vary based on your SAML identity provider. See examples for identity providers below.
Step 1: Create a new SAML application in your identity provider with the following info:
ACS URL / Reply URL - leave this empty. We will provide you with this link as a very last step.
Entity ID / Identifier -
https://app.icepanel.io/auth/saml
Step2: Fill out below form:
Fill out our SAML registration form with the requested information from your app. Once that's submitted, it can take up to 1 business day for us to configure it. We'll be in touch shortly to confirm and check everything is working.
SSO share links
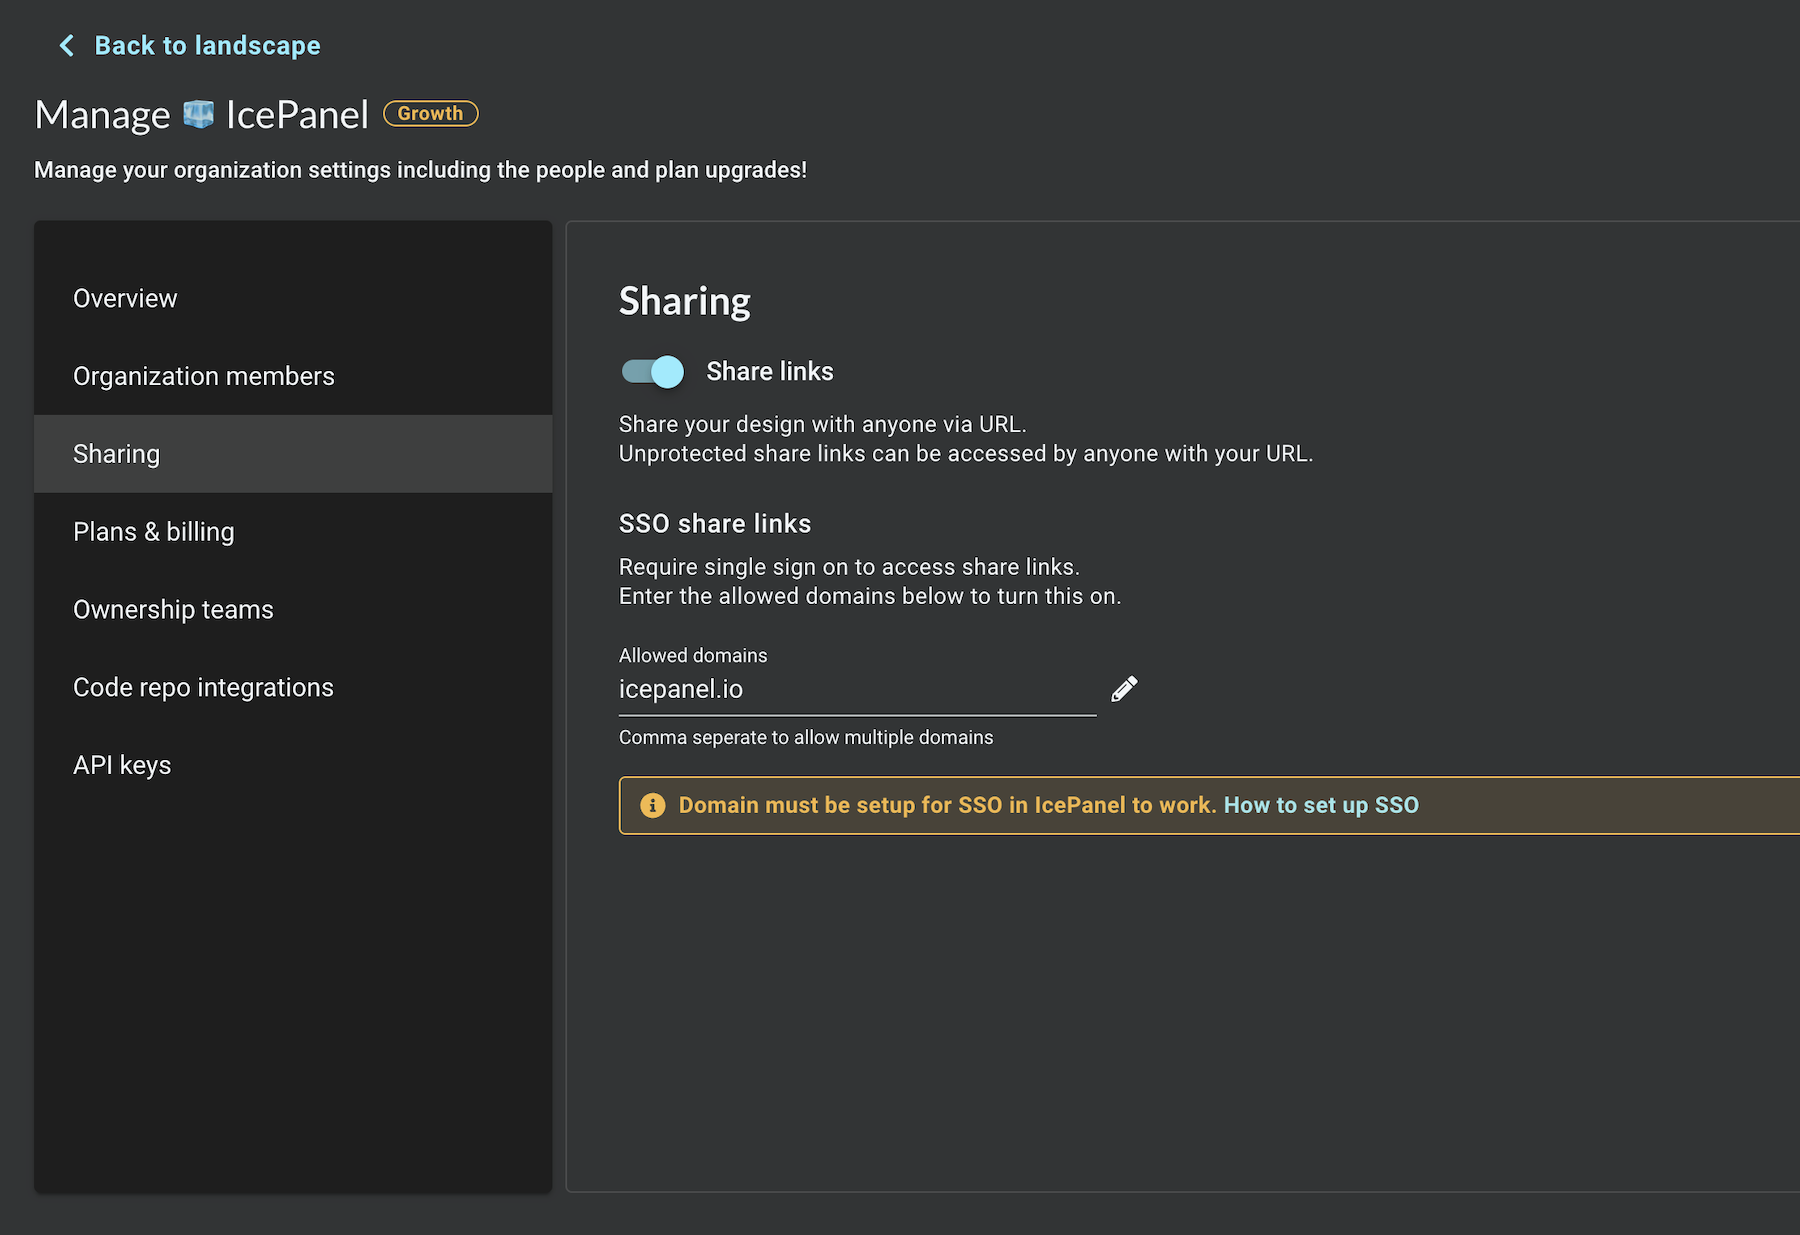
Once you've configured a SAML app with us you can globally secure access to share links with SSO.
In organization management you can set one or more domains that can access your share links securely. The example below will restrict all share link access to users who authenticate with @icepanel.io email addresses.

Users will now be redirected to your SAML authentication flow before gaining access to a share link. They will not be required to create an IcePanel account, so these users will not count toward your plan seat count in any way.
Identity providers
We support all identity providers that support SAML 2.0.
Google Workspace
First navigate to
Apps/Web and mobile appson the Google Admin console.Click
Add app/Add custom SAML app.Fill in the app name as
IcePaneland upload the IcePanel logo.Copy the values from the
SSO URL,Entity IDandCertificatefields into our SAML registration form.Leave the
ACS URLfield to empty. We will provide you with this URL as a very last step.Set the
Entity IDfield toicepanel.io.Set the
Name ID formatfield toEMAILand theName IDfield toPrimary email.Click the
User accesssection and check the toggle forON for everyone.Done, now wait for us to let you know it's all setup on our end.
Microsoft Entra ID
First navigate to
Entra IDon the Microsoft Entra ID portal.Click
Enterprise applicationsfrom the left sidebar.Click
New applicationand pick theNon-gallery applicationtype.Fill in the app name as
IcePaneland upload the IcePanel logo.Click
Single sign-onin the left sidebar and choose theSAMLmethod.Click the edit pencil in the
Basic SAML configuration.Set the
Identifier (Entity ID)field toicepanel.io.Leave the
Reply URL (Assertion Consumer Service URL)field to empty. We will provide you with this URL as a very last step.Copy the
Certificate (Base64),Login URLandAzure AD Identifierfields into our SAML registration form.Click
Users and groupsin the left sidebar and add the users or groups that need access to IcePanel.Done, now wait for us to let you know it's all setup on our end.
Okta
First navigate to
Admin > Applicationson the Okta portal.Click
Add New Appand select SAML 2.0.Leave the
Single sign on URLfield to empty. We will provide you with this URL as a very last step.Set the
Audience URI (SP Entity ID)to icepanel.io.Set the
Name ID formatto email address and theApplication usernameto email.Click
View setup instructionsget the necessary information.Copy the values from the
SSO URL,Identity Provider Issuer (Entity ID)andCertificatefields into our SAML registration form.Make sure the required users or groups have permission to access to the Okta app.
Done, now wait for us to let you know it's all setup on our end.
Need more support?
Book a call with our technical team if you have any questions about SSO.
Last updated
Was this helpful?